I had known for some time that it was possible to encrypt e-mail using third-party programs such as PGP and GnuPG. More recently, I became aware that it was possible to sign and encrypt e-mail in Mail.app using a certificate obtained from a certificate authority such as Thawte. But here I will explain how to exchange encrypted e-mail between two Macs using nothing but Apple's Keychain Access and Mail programs.
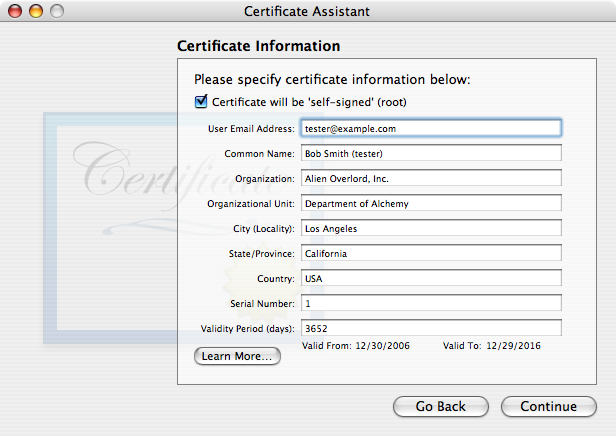
Open the Keychain Access program in your Utilities folder. Pull down its application menu and choose Certificate Assistant. After clicking Continue in the Introduction page, choose the first radio button, "Create a certificate for yourself", in the Options page. The Certificate Information page is where we specify the associated e-mail address and the certificate name. If you have multiple e-mail addresses, you may find it useful to indicate the e-mail account in the certificate name. For example, if Bob Smith is creating a certificate to sign or encrypt messages from his account tester@example.com, he might name the certificate "Bob Smith (tester)". You might also want to increase the validity period to more than one year. In the remaining assistant pages, you can take the default settings. At the end, the assistant will create a key pair and a certificate and put them in your user keychain.
When the new certificate has been created, you’ll see a warning in red type that “This certificate is not in the trusted root database”. As a result, you cannot yet use the certificate to sign e-mail. We’ll have to tell the computer to trust the certificate.
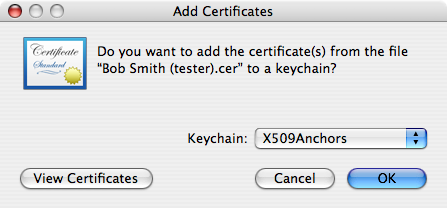
Click Certificates in the Category list of the Keychain Access window. Then find the new certificate in the list of certificates and select it. Pull down the File menu and choose Export.... Export the certificate in the .cer format, say on your desktop. Double-click this file. An Add Certificates window will appear within Keychain Access. Set the Keychain pop-up menu to X509Anchors and click OK. You will need to enter an administrator password to complete the operation.
At the moment, Keychain Access still says that the certificate is not in the trusted root database. But if you quit Keychain Access and reopen it, it will say “This certificate is valid” when you select the new certificate. The next time you launch Mail, you will be able to sign e-mail from the address associated with the certificate.
By the way, if you created the certificate, you might suppose that you could find it more easily in the My Certificates category rather than the Certificates category. If you do that, you’ll find that you are unable to export the certificate in the right format.
Suppose that Alice and Bob are both using Mac OS 10.4 and Mail, and want to send signed or encrypted e-mail to each other. They can set it up as follows:
Things get yet more complicated when you use Thunderbird instead of Mail, because Thunderbird uses its own repository of certificates rather than using the Mac keychain. I will go over the steps, but you might want to check the Thunderbird knowledge base for more detail.
Your self-signed certificates must be exported from Keychain Access in two different formats. First, export each one in the .cer format, as used in the Trusting a Certificate section above. Second, select the My Certificates category, select all your certificates at once, and export them in the .p12 format (your only choice). You will be asked to assign a password to the .p12 file, because it contains the private keys associated with the certificates.
In Thunderbird, open the Preferences dialog, click the Privacy icon, then the Security tab, and then the View Certificates button. You’ll get another window for manipulating certificates. Click the Authorities tab and import each .cer file, specifying that it should be trusted for e-mail signing. Then click the Your Certificates tab and import the .p12 file.
Finally, go into the Security section of your e-mail account settings in Thunderbird to select the certificate to be used for signing. You should now be able to sign your e-mail.
Unless you are willing to use Mail temporarily, you will not be able to get another person’s certificate simply by receiving a signed message from that person. You will have to ask the sender to send you a .cer file. Once you have it, you need to import it under the Authorities tab in Thunderbird’s certificate window.
Last modified: 1 January 2007
Copyright ©2007, James W. Walker